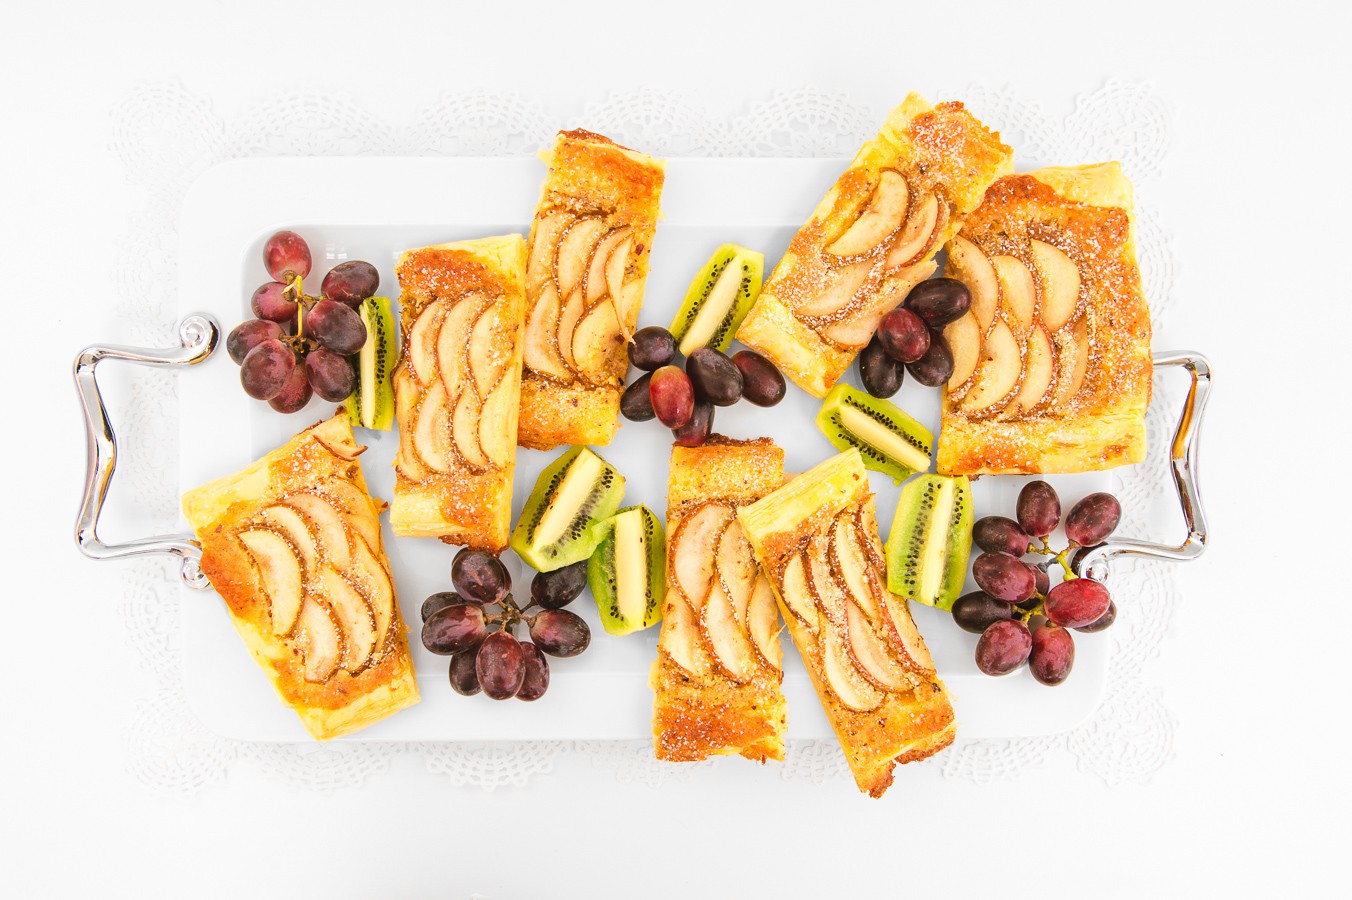
25 May Pear and Hazelnut Tart
All the lovely seasonal fruit that becomes available as the seasons change is a great inspiration for my baking. At this time of year it’s the plums and pears that catch my eye.
A few weeks ago we were having a large group of friends around and I needed a relatively light dessert to feed a crowd, that could be prepared in advance. This Pear and Hazelnut Tart fit the bill. The crisp pastry, the creamy, nutty filling and the sweet pears complement eachother perfectly. It’s a stunning dish to present, and nice and easy to serve too!
A note on puff pastry. Have I ever made homemade puff pastry before? Yes. Did it take hours and hours? Yes. Was it delicious? Yes. Was it so much more delicious than the shop-bought variety that it justifies making my own puff pastry every time? No! This is one shortcut I am not ashamed to make.
PS. Another favourite dessert of mine in the colder months is Poached Pears with Vanilla Marscapone Cream.

Ingredients:
(Serves 8)
35g hazelnuts
60g butter, softened
65g castor sugar
A pinch of salt
30g cornflour
1 large egg
2ml vanilla extract
1 x 400g sheet of ready-made puff pastry, thawed in the refrigerator
3 medium sized pears – firm, but ripe
20ml lemon juice
20ml castor sugar, for sprinkling
20ml icing sugar, for dusting
Directions:
- Toast the hazelnuts in a dry frying pan on high heat, tossing frequently. As soon as the nuts start to turn golden, remove from the heat and transfer to a dish to cool (watch carefully as they turn quickly).
- Once the nuts have cooled completely, whizz them in a food processor/blender until finely ground.
- Cream together the butter and sugar, then add the ground hazelnuts, salt and cornflour. Mix well.
- Add the egg and vanilla extract, then beat until combined.
- Refrigerate the mixture for 1 hour.
- Preheat the oven to 180°C.
- Slice the pears into thin slices, removing any pips. Drizzle with lemon juice and set aside.
- Remove the pastry from the fridge and lay out on a chopping board in a landscape position.
- Working from top to bottom, cut 5 thin strips of pastry from one edge (about 1,5cm wide). Slice the remaining rectangle of pastry in half down the middle.
- Place both large rectangles of pastry onto a baking sheet lined with greaseproof paper (in portrait position). Brush all edges with a little water. Now place 2 strips of pastry onto each long edge of each rectangle. Cut the remaining strip into 4 pieces and use these pieces to fill in the gaps on the short edges of the rectangles. Both rectangles of pastry should now have an edge all the way around.
- Remove the hazelnut mixture from the fridge and spread it over the inside base of each rectangle, avoiding the raised edges. It should be spread quite thinly or it will leak during baking. I only used about 2/3 of the mixture.
- Arrange the pear slices on top of the filling, overlapping them slightly. Sprinkle with the castor sugar.
- Bake for 30-35 minutes until the pastry is golden and puffed up.
- Just before serving dust with icing sugar. Delicious served warm with ice cream.
- This tart is best served immediately, but can be served at room temperature on the day it was made, or reheated in a 180°C oven for 3-5 minutes.


Elke
Posted at 21:08h, 19 JuneSounds and looks delicious. For those of us in N America who use cup measurements, here’s a useful link: http://www.jsward.com/cooking/conversion.shtml