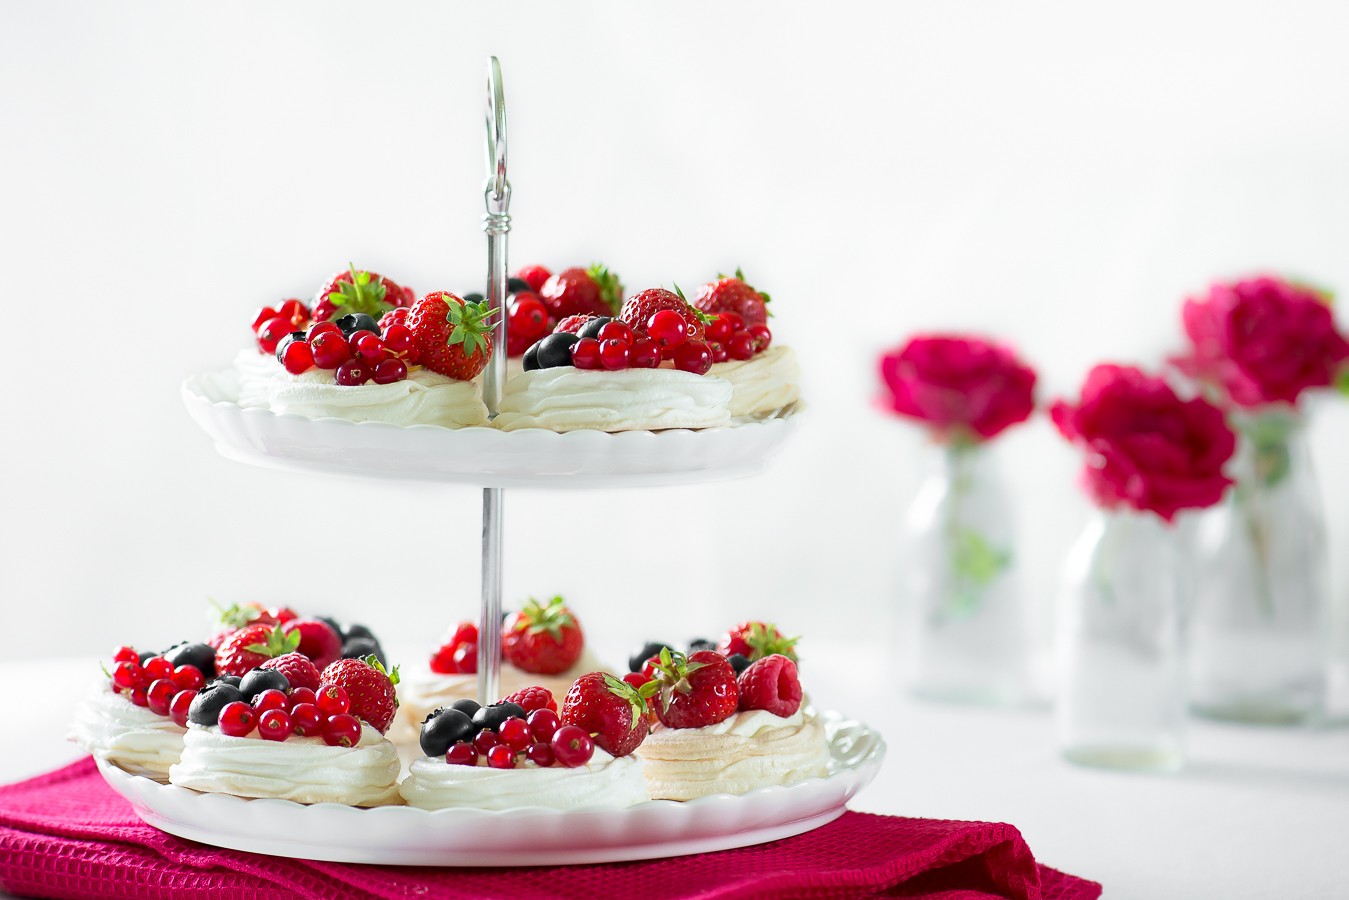
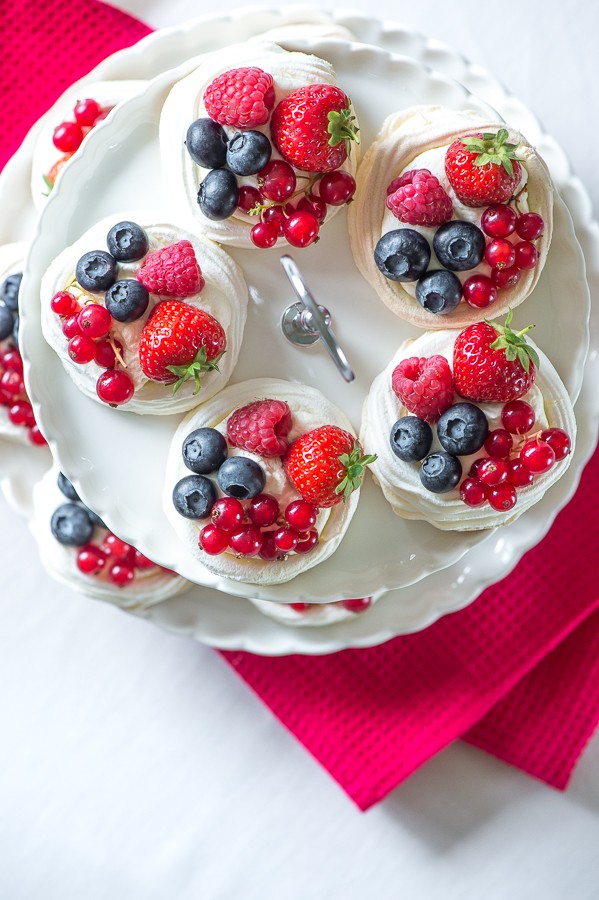
07 Jul Meringue Nests with Fresh Berries and Cream
The perfect meringue is crisp on the outside, and slightly chewy and marshmallowy on the inside. When topped with clouds of cream and tart berries you have a splendid summer treat! This is a great dessert for a crowd as it easily feeds 10 people and the meringues can be made a few days in advance. As an added bonus its gluten-free.
Meringues are incredible when you think about it. It’s pretty amazing that two humble ingredients can be transformed into a beautiful and delicious confection! The magic of meringue comes down to the foaming properties of the proteins in the egg white. In simple terms, whisking an egg white causes the proteins to unfold, then rearrange into a network structure that can hold the air bubbles. Sugar helps to stabilize the beaten egg whites and hold their shape. The addition of an acid like cream of tartar or lemon juice slows down the bonding of the proteins so that more air can be added.
Once you have mastered the art of making these meringue nests, you can try all sorts of delicious fillings. Why not try brushing the inside of the meringue nests with dark chocolate then filling with chocolate mousse and topping with a strawberry? Or whip up a batch of lemon curd with your leftover egg yolks, and use as a bright and zesty filling.

Ingredients:
(Makes 20 – 25)
For the meringues:
6 large egg whites
300g castor sugar (1¼cup)
5ml lemon juice (1 tsp)
5ml vanilla extract (1 tsp)
For the filling:
200g white chocolate
250ml cream (1 cup)
5ml vanilla extract (1 tsp)
10ml icing sugar (2 tsp)
About 1kg of mixed fresh berries
Directions:
- Preheat the oven to 110°C. Line a baking tray with greaseproof paper. Pencil circles onto the paper, about 6 cm in diameter (I traced around a drinking glass, or use a round cookie cutter).
- Place your egg whites into a clean, dry glass/metal bowl. Whisk with an electric/stand mixer until frothy, then add the lemon juice.
- Continue whisking on medium until soft peaks form and the egg whites have doubled in volume, then up the speed to high and start adding the castor sugar, one tablespoon at a time.
- Continue whisking until all the sugar has been added and the meringue is glossy, smooth and forms stiff peaks when the beaters are lifted.
- If you rub a little of the meringue between your fingertips, there should be no grains of sugar. If there are, continue whisking a little longer.
- Fold in the vanilla extract.
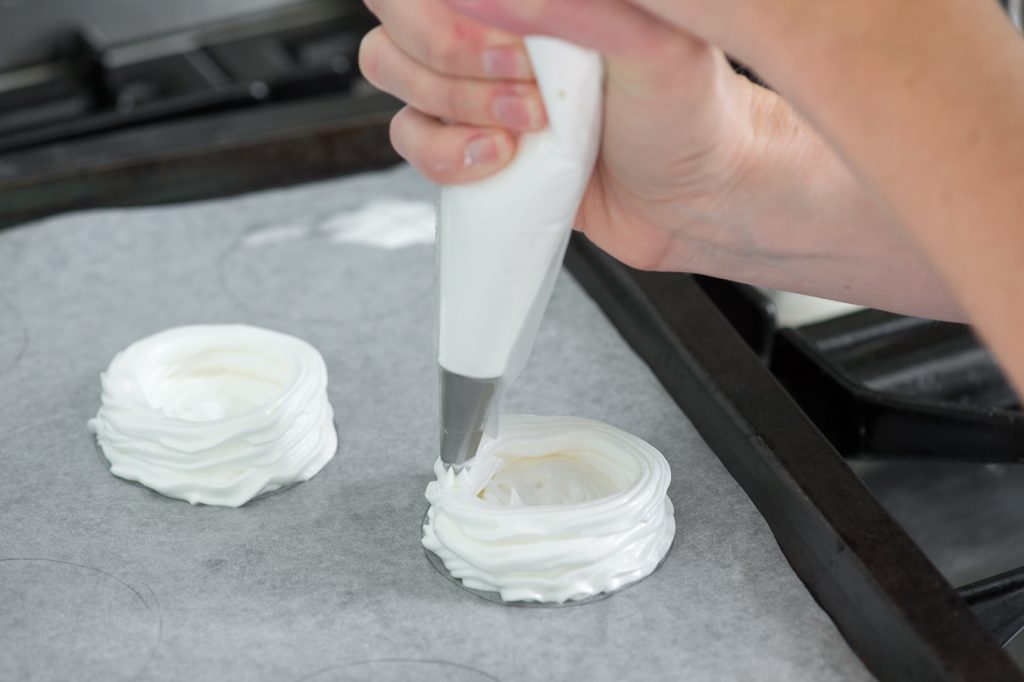
- Spoon the meringue into a piping bag fitted with either a plain or star nozzle. Fill each pencil circle with meringue, then pipe 2 rings around the edge of the circles to make a nest shape.
- Bake for 1 hour, then switch off the oven and leave the meringues inside for another hour to dry out.
- Carefully lift the meringues off the paper and leave to cool completely.
- In the meantime whip the cream, icing sugar and vanilla extract until stiff and refrigerate.
- Melt the white chocolate over a bowl of simmering water. Brush the chocolate onto the inside of the nests and leave to set at room temperature. Store in an airtight container until needed.
- Just before serving, use a piping bag to fill each meringue nest with the cream, then arrange the berries on top.
TIPS:
– Ensure your bowl and beaters are totally clean and dry. Any trace of egg yolk or grease will prevent the egg whites from achieving their full, frothy volume. Pour boiling water over the bowl and beaters and dry with a paper towel just to be sure, or wipe down with a little lemon juice. Since fat clings to plastic, avoid using a plastic bowl and go for a glass or metal bowl instead.
– Eggs are easier to separate when cold but whisk to a higher volume at room temperature. After separating your cold eggs allow them to stand at room temperature for 30 minutes.
– Avoid making meringues on a humid day – the sugar in the meringue mixture readily absorbs moisture causing the meringues to weep or become soft.
– Using a low oven temperature and long baking time is what gives the meringue the crisp outside/chewy inside texture. It also prevents the meringues from browning – they should be cloud-white.
– The meringue nests can be made a few days in advance, as long as they are stored in an airtight container to keep them crisp.
– The white chocolate coating helps prevent the meringues from absorbing moisture from the cream and getting soggy, however it’s best to fill them as close to serving as possible for an extra crisp meringue.
Elke
Posted at 16:49h, 10 JulyThey look beautiful. I’m going to make mini ones (with one strawberry in each) for the food table for a visiting author reading evening at out hall.Thanks for the inspiration!
Astrid
Posted at 19:25h, 10 JulyThat sounds wonderful Elke. Glad you got some inspiration from the recipe!