31 Mar Filled Easter Eggs
Plenty of lovely chocolates around at Easter time. Plenty. Almost an annoyingly large amount. So why would make your own?
There is something incredibly satisfying about making your own chocolates. Seeing the fruits of your labour, staring at the pretty, glossy shapes and thinking “I made those”. There are so many beautiful chocolate moulds at baking stores these days (especially at Easter) that you’re sure to find something you love. I think the best thing about making your own chocolate is choosing the chocolate/filling combinations! You can really tailor-make your very own personal favourite.
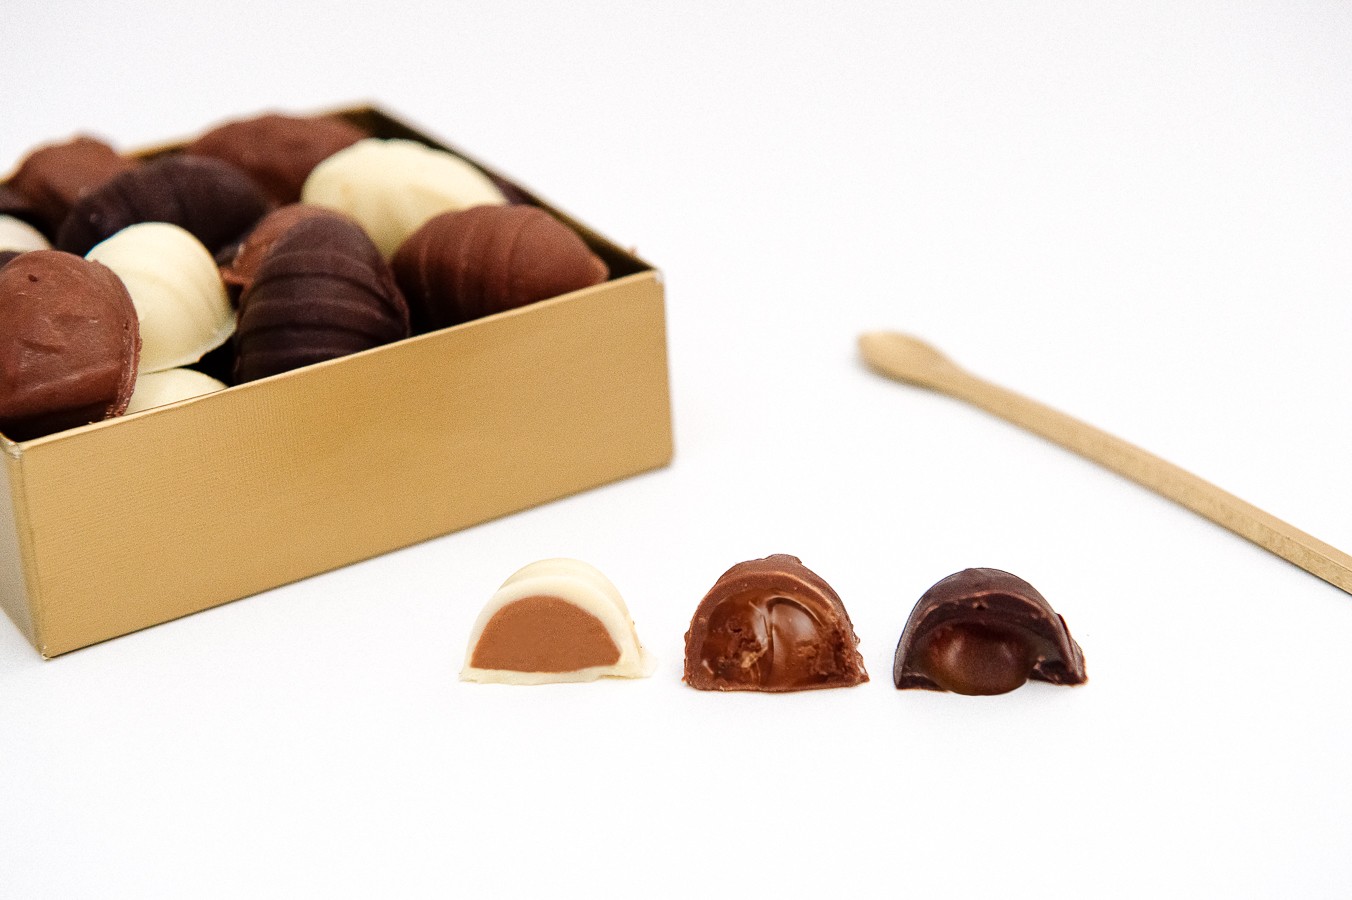
I’m crazy about Belgian chocolate seashells filled with hazelnut praline, so I was over the moon to find hazelnut praline at my local baking store. That solved my white chocolate filling selection. Nutella is another favourite of mine (and just about anyone really!) so that was an easy choice for the milk chocolate filling. The world’s obsession with salted caramel is still going strong, and it pairs extremely well with dark chocolate so I chose that for my third combination. I used the same recipe for the salted caramel as I do in my Chocolate Salted Caramel Tart, except that I changed the ratio of butter and cream to thin it out a bit and make it easier to work with (see recipe below).
Another option is to use milk, white or dark chocolate ganache as a filling (for a quick ganache recipe add 2 parts chocolate to 1 part very hot double thick cream and stir until smooth, then cool to room temperature). Peanut butter or marzipan work well too.
A few things to keep in mind when making your own chocolates:
– It’s quite important that you temper your chocolate (I talk more about tempering in White Chocolate Bark post). Use the best quality chocolate you can find. I used couverture chocolate which is available at baking or speciality chocolate stores.
– Be aware of the temperature of your components. Adding a hot filling to cold a chocolate shell will result in a melted mess. But if the filling is too cold it will be too thick to pipe. So keep your filling as close to room temperature as possible, and only chill your chocolate just enough to set.
– Handle the chocolates very carefully or you will end up with fingerprints all over your masterpieces! Candy gloves are great for this and can be purchased from baking stores.
Ingredients:
Milk Chocolate Nutella Eggs:
200g good quality milk chocolate
100g Nutella
White Chocolate Hazelnut Praline Eggs:
200g good quality white chocolate
100g hazelnut praline
Dark chocolate Salted Caramel Eggs:
200g good quality dark chocolate
100g salted caramel sauce
Directions:
- Ensure your mould is clean and completely dry. Any water droplets will affect the appearance of the chocolate.
- Place 150g of the chocolate into a heatproof bowl over a pan of very hot water (or microwave in 30 second increments). Stir occasionally, then remove it when it is almost all melted – do not allow it to overheat. Stir the mixture to cool it slightly, then start adding the remaining 50g chocolate (the seeding chocolate) about a tablespoon at a time. Continue adding and stirring, until the mixture is smooth and all the chocolate is melted. This will take around 5 minutes depending on how warm the weather is. If necessary, you can microwave the mixture for 5 seconds if it is not yet completely melted.
- Pour your tempered chocolate into the mould, filling each cavity completely. Tap the mould on a hard surface to remove any air bubbles, and swirl it around a bit to ensure all sides of the cavities are covered completely.
- Turn the mould upside down over the bowl of melted chocolate and tap gently to remove the excess chocolate, using a palette knife to scrape the excess off.
- Place the mould in the fridge for 10 minutes.
- Before using your filling, check that it is at room temperature and quite soft. If necessary, place your filling into a heatproof bowl and rest the bowl in larger bowl of warm water to soften.
- Spoon the softened filling into a disposable piping bag and snip off the tip, leaving a small opening (about 2mm wide).
- Carefully pipe the filling into the chocolate shells, about 3/4 full, then refrigerate for about 20-30 minutes until the filling has set.
- Pour the tempered chocolate over the moulds to fill the remaining space left in the cavities. Use a palette knife to neatly scrape off any excess chocolate.
- Refrigerate for 30 minutes. To remove the chocolates, gently twist the mould a little and invert the mould. If the chocolate has been properly tempered and sufficiently cooled they should just fall out with no effort!
- To store the chocolates, place them in an airtight container. If it is not too hot they are best stored at room temperature.


No Comments