07 Mar Peppermint Creams
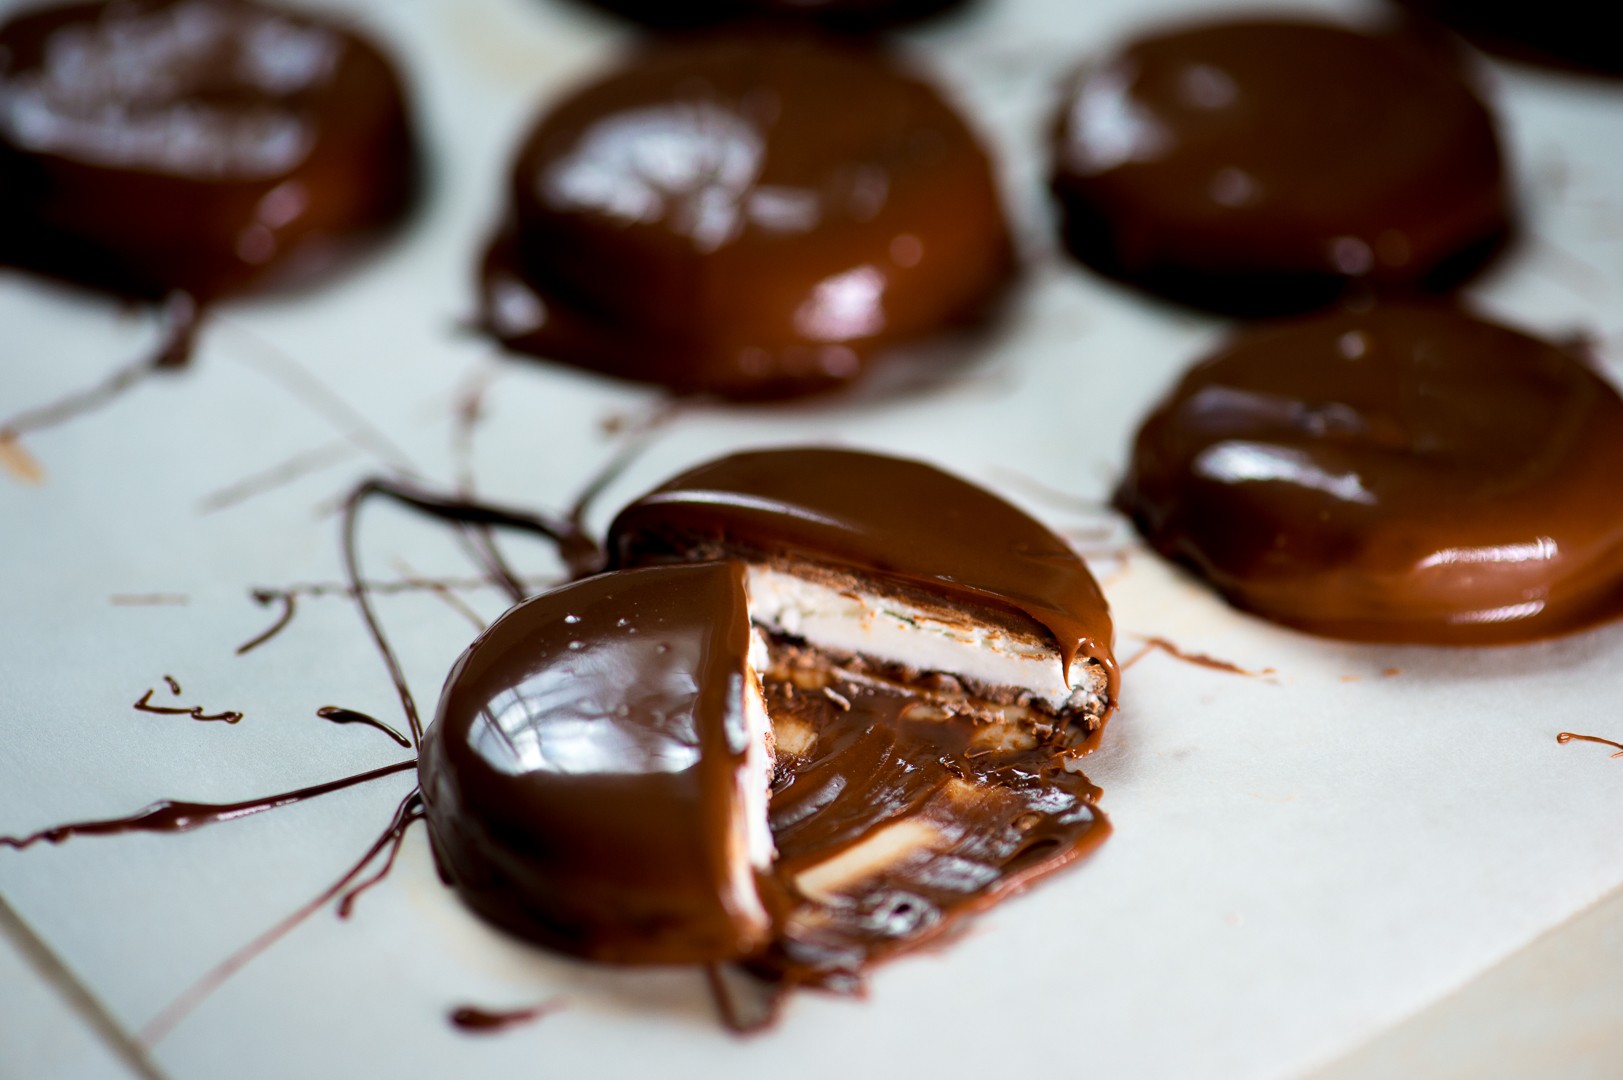
Do you remember After Eights? If you never had the pleasure of tasting one, they are delicious thin squares of dark chocolate filled with a minty cream (also known as Peppermint Creams or Thin Mints). The refreshing peppermint flavour makes them light enough to have after dinner when you don’t want a rich dessert. As far as I’m aware they are not available in South Africa anymore, but it turns out they are a doddle to make at home!
The trick to making the best Peppermint Cream, as with most things, is using excellent quality ingredients. A good 70% dark chocolate will be easy to melt and work with, and taste rich and smooth. Instead of using an artificial flavour, I prefer to use pure flavour extracts. If peppermint is not your thing, many other flavours would work just as well: vanilla, orange, or even coffee!
This recipe can easily be made vegan by using a vegan dark chocolate and vegan condensed milk.

Ingredients:
250g icing sugar, plus extra for rolling
120g condensed milk
2,5ml Nielsen-Massey Pure Peppermint Extract (available at Faithful to Nature)
200g dark chocolate
Directions:
- Sift the icing sugar into a bowl. Make sure there are no lumps!
- Stir in the condensed milk and peppermint extract. It will seem like the mixture is too dry but it will come together. Use your hands to bring the mixture together, then turn out onto a clean surface dusted with a little extra icing sugar, and knead for a few minutes until smooth.
- Dust your work surface and hands with icing sugar and roll the mixture out with a rolling pin. I like to roll it quite thin, about 2mm thick. Use a cookie cutter to cut out shapes as desired (or just slice into squares). Place the shapes on a lined tray and set aside for at least 1 hour to dry. The shapes should be quite firm now, if not you can pop them in the freezer for 10 minutes.
- Melt the dark chocolate (either over a pan of simmering water or at 30 second intervals in the microwave). If you find it too thick, you can add 1 teaspoon of vegetable oil.
- Carefully dip each shape into the melted chocolate, ensuring all sides are covered. Transfer to a tray lined with greaseproof paper and leave to set at room temperature.
- Store in an airtight container at room temperature for 1-2 weeks.

No Comments